
How to Make a Bow Quieter and Silence It

As an Amazon Associate, I may earn from qualifying purchases at no extra cost to you.
Have you ever tried archery and thought to yourself “Wow, how did they manage to hunt with such loud weapons back in the days”? Because I sure have.
We’ve recently bought a bow for our son to practice shooting at a target, and he’s been complaining about the very loud vibrations coming from the bowstring and the limbs, as well as some other noises it was making.
Determined to find the solution to this sound-related problem as well, I’ve done a little researching.
Aside from making the bow quieter, I have even managed to improve its performance a little.

How to Make a Bow Quieter
1. Silence the bowstring
Naturally, each of these noisy problems has a unique solution, which is why I’m starting with the most obvious and basic one – the bowstring, considering some bows are not split-limb.
The easiest and probably the cheapest way to dampen the noise your bow string is making is to put some cat whiskers on it (disclaimer: I do not ask of you to pluck the whiskers off of your pet!)
Take those rubber strands, fold them once, wrap them around your bow string (so that they’re essentially folded twice), and tie them up with thin rope or some strong thread.
You will also have to cut the ‘bow tie’ ends and pull apart the other ones so they take up the shape of a fuzzy ball.
Keep in mind it works best if you put one on each end of the bowstring.
The more modern version of these is rubber string dampeners.
Some of them have the slit that goes all the way through to the hole in the middle, so you can just slip them onto your bowstring and then secure them with zip ties, often included in the package, while in order to install the other ones you will need to remove the string, slide them onto it and then put it back.

Next up, we have monkey tails (seriously, who comes up with these names?!) – another type of rubber bowstring dampener.
They are a little more expensive than the former – around $15, compared to around $8-10.
Monkey tails have three parts – the tail, the hole and the flare, which is the wide part in the middle.
Put the flare on the bowstring, take the tail, wrap it around the string, put it in the hole and pull until the flare goes through, so as to keep it in place.
Although it is possible to slide them around a little bit, it would be the best to position them before you tighten them up.

Aside from these, there are a lot of other shapes of string stabilizers – bats, sleeves, wishbones – and they all work on the same principle.
The most expensive way to deaden the sound of your bow string is to use a string stopper.
This odd contraption has become so common in archery so that it even comes as a built-in part in some types of bows.
However, if you do not possess one of those bows, you can still get the string stopper at Amazon or eBay, as well as some other hunting and fishing retail stores, and the price will usually be anywhere from 20 to 50$.
Unlike the previous types of dampeners, installing this one requires a little more work, as well as some specific tools, but the instructions can be found all over YouTube, so we are not going to go into details here.
The main idea is to put it as close to the center of the bowstring as possible.
Keep in mind that the longer your bow is, the more effective the string stopper becomes – if you have a shorter bow, you might want to stick to some of the former (and cheaper!) methods.
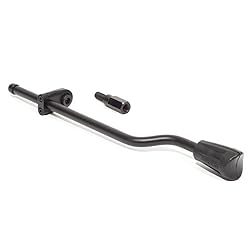
2. Use a stabilizer
If you are a competitive shooter or maybe into Olympic archery, you might have noticed that professionals use huge stabilizers, sometimes over two feet long.
They must be something you use to improve the accuracy and performance of their bows, right?
Well, that is certainly not wrong. But, they are also used to dampen the noise the bow makes.
Now, imagine hunters carrying those long, metal pipes around, together with the rest of their equipment, through the thick woods on frozen mornings. Looks funny, doesn’t it?

Luckily, the design of those has somewhat improved and now their size is completely acceptable for everyone – they are only around 3-12 inches long, but are also quite expensive – the ‘decent’ ones are around $40-50.
How Stabilizers Work
The stabilizers are installed so that they are underneath your arm while you are holding the bow.
Their primary function is to – duh – stabilize the bow, by putting the weight below your arm and more to the front, reducing the oscillations that occur especially while the bowstring is fully drawn.
I've already mentioned they come in different lengths – the shorter ones are mostly there to absorb the vibrations and dampen the sound, which is very useful for bow hunters since they don't stick out like their longer counterparts and they also lack a little weight.

The longer ones also usually have weights at the protruding end, and while it is useful for balance, it is also something to look out for: depending on the bow you have, the weight might be too much and it might cause the bow to constantly tilt forward, which is a bad thing.
In that case, you might want to add another one ‘on the side’ or towards your body, so it counterbalances the first one and prevents the bow from tilting too much.
In case you are a right-handed shooter and have all the equipment on the right side of the bow, installing the side rod on the left side might prevent the bow from tipping to the right because of all the weight; same goes for left handed shooters.
3. Silence the limbs
Apart from the bowstring, limbs also cause a lot of noise because of the vibrations they make when you shoot, which is why, apart from string dampeners, we also have limb dampeners that work on the similar principle.

Depending on the type of limbs, there are two types of bows – solid limb and split limb bows.
There is a special type of limb dampeners for each of those.
If you have a solid limb bow, your dampener installation process might be slightly easier: you just stick it firmly to the side of the limb.
These are slightly more expensive than their string counterparts (around $15-20), but they do reduce the vibrations and the unpleasant buzzing by up to 80%!
In case your bow has split limbs, you just insert the dampener between them.
Some of them also have the screw-on part which further reduces the vibrations and helps it stick in place more firmly.
There are also ones that come with wider and narrower side so you can fit them into your bow accordingly.

They also cost around $15-20 and can be bought almost anywhere, as they are one of the most basic archery gear parts.
Same as string dampeners (and my husband and I), these work best in pairs – one on the ‘top’ and one on the ‘bottom’ limb.
4. Go heavy
You would think that using light bow or arrows makes it quieter, but actually, it is quite the opposite.
The heavier and more solid the bow’s frame is, the more vibrations it absorbs, thus making it less noisy – same goes for arrows.
However, if you pair up a lightweight bow with some heavy arrows, they might appear stiff and might not ‘flex’ as much as you want them to.
Same goes for the opposite case – if you have a heavy bow and light arrows, they might flex a little too much, and also make some annoying clanking sound whenever they come in contact with the bow.

If you are following the expert advice – which can be found all over YouTube and the Internet in general – you have the correct weighing bow and arrows and still hear a lot of noise coming from them while you shoot, you might want to try some moleskin.
Moleskin is a fleece-like, heavy cotton fabric that has a wide range of use and can be bought in shoe stores, as people stick it to their skin in order to prevent blisters and other nasty stuff.
It is also very useful in archery, as it prevents the metal-on-metal contact sounds that might be infuriating to many others, as they are to me.
Its usage is very simple – just stick it to the ‘problematic’ area of your bow, typically on the shelf, and you are good to go. This one is cheap, durable and easily accessible!
5. Check Your Quiver, Screws and Cams

Apart from all these listed methods, there are some other small things you can do to ensure your bow is as quiet as possible, such as checking your quiver.
If your quiver is rattling, chances are it is not attached to the bow tightly enough and you should fix that.
Also, another thing that might be the problem is the screws, as funny and basic as it may sound.
If you hear excessive rattling or casing sounds, that is because your screws are too loose.
Apart from reducing the noise, it will also enhance your bow’s accuracy and performance, which is important for both hunters and recreational shooters alike.

This last one goes especially for those who have dual cam bows, as they can easily ‘fall out’ of tune, as crazy as it sounds – you need to tune your bow regularly to avoid the cams becoming dissonant, which usually means one of them keeps buzzing when the other one is done and results in a lot of unwanted noise.
However, single cam bows will also require some tuning from time to time.
On Silencing a Bow
One thing we have learned from here is that making the bow quieter will also improve its accuracy and performance.
We have also learned that anything can be made quieter for a relatively small amount of money and little to no time invested.
Disclaimer: the sound of arrows hitting the target cannot be dampened and you should refrain from practicing shooting during the parts of the day when people are resting.
How to Make a Bow Quieter and Silence It
A quiet bow is a deadly bow. Learn how to make a bow quieter with these simple accessories. You won't believe the FREE ...
Instructions
- Silence The Bowstring
- Use A Stabilizer
- Silence The Limbs
- Go Heavy
- Check Your Quiver, Screws and Cams